Some tips and tricks for Photographing your painting without getting too technical.
We acknowledge how difficult it can be to photograph your paintings, but understanding how your camera or device deals with light, may help with a better rendition of our painting.
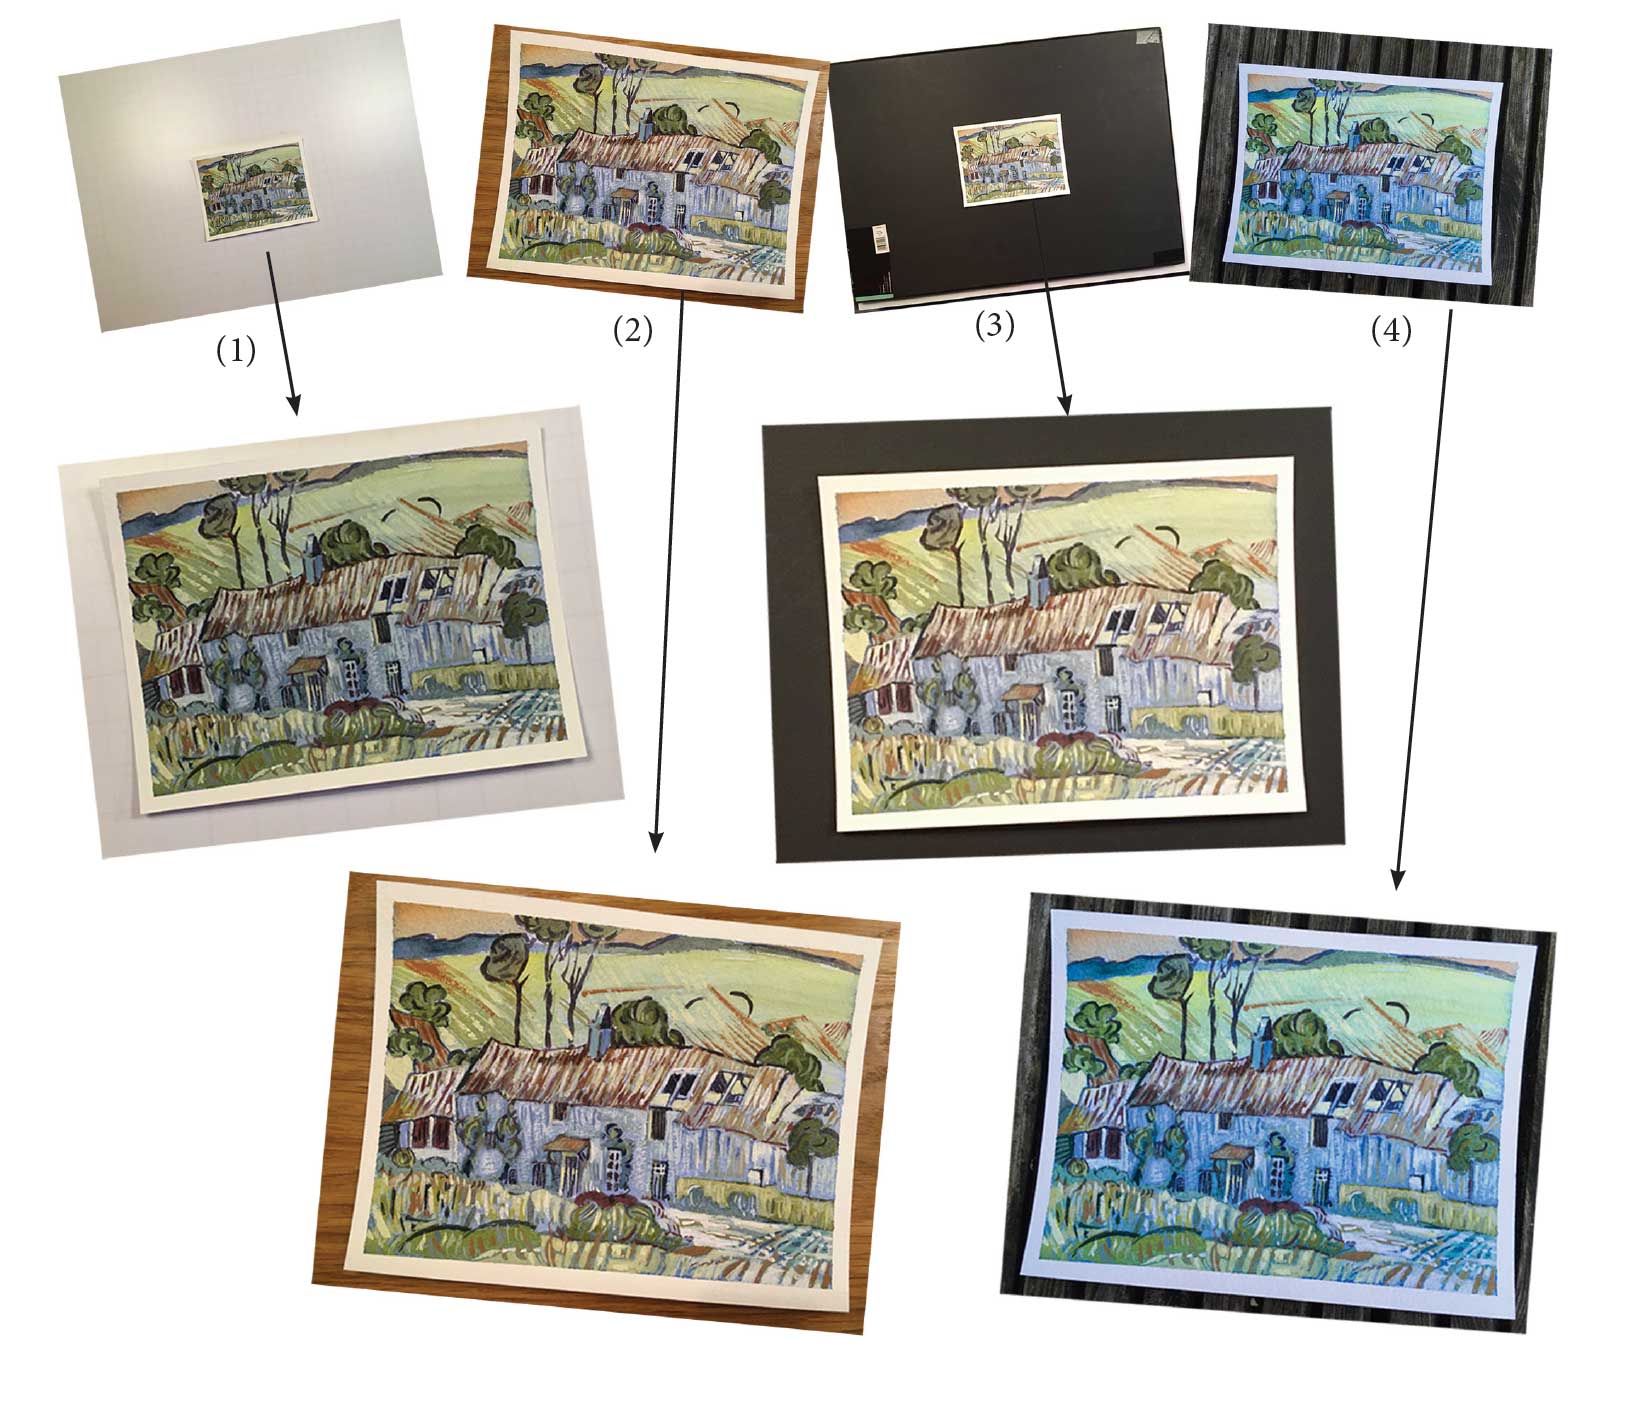
The two examples below demonstrate how the influence of different lighting and backgrounds can affect the photograph of your painting. Example 1 was taken on an iPad. The top row of the images (1-4) are the original photos un-cropped.
Things to Note :
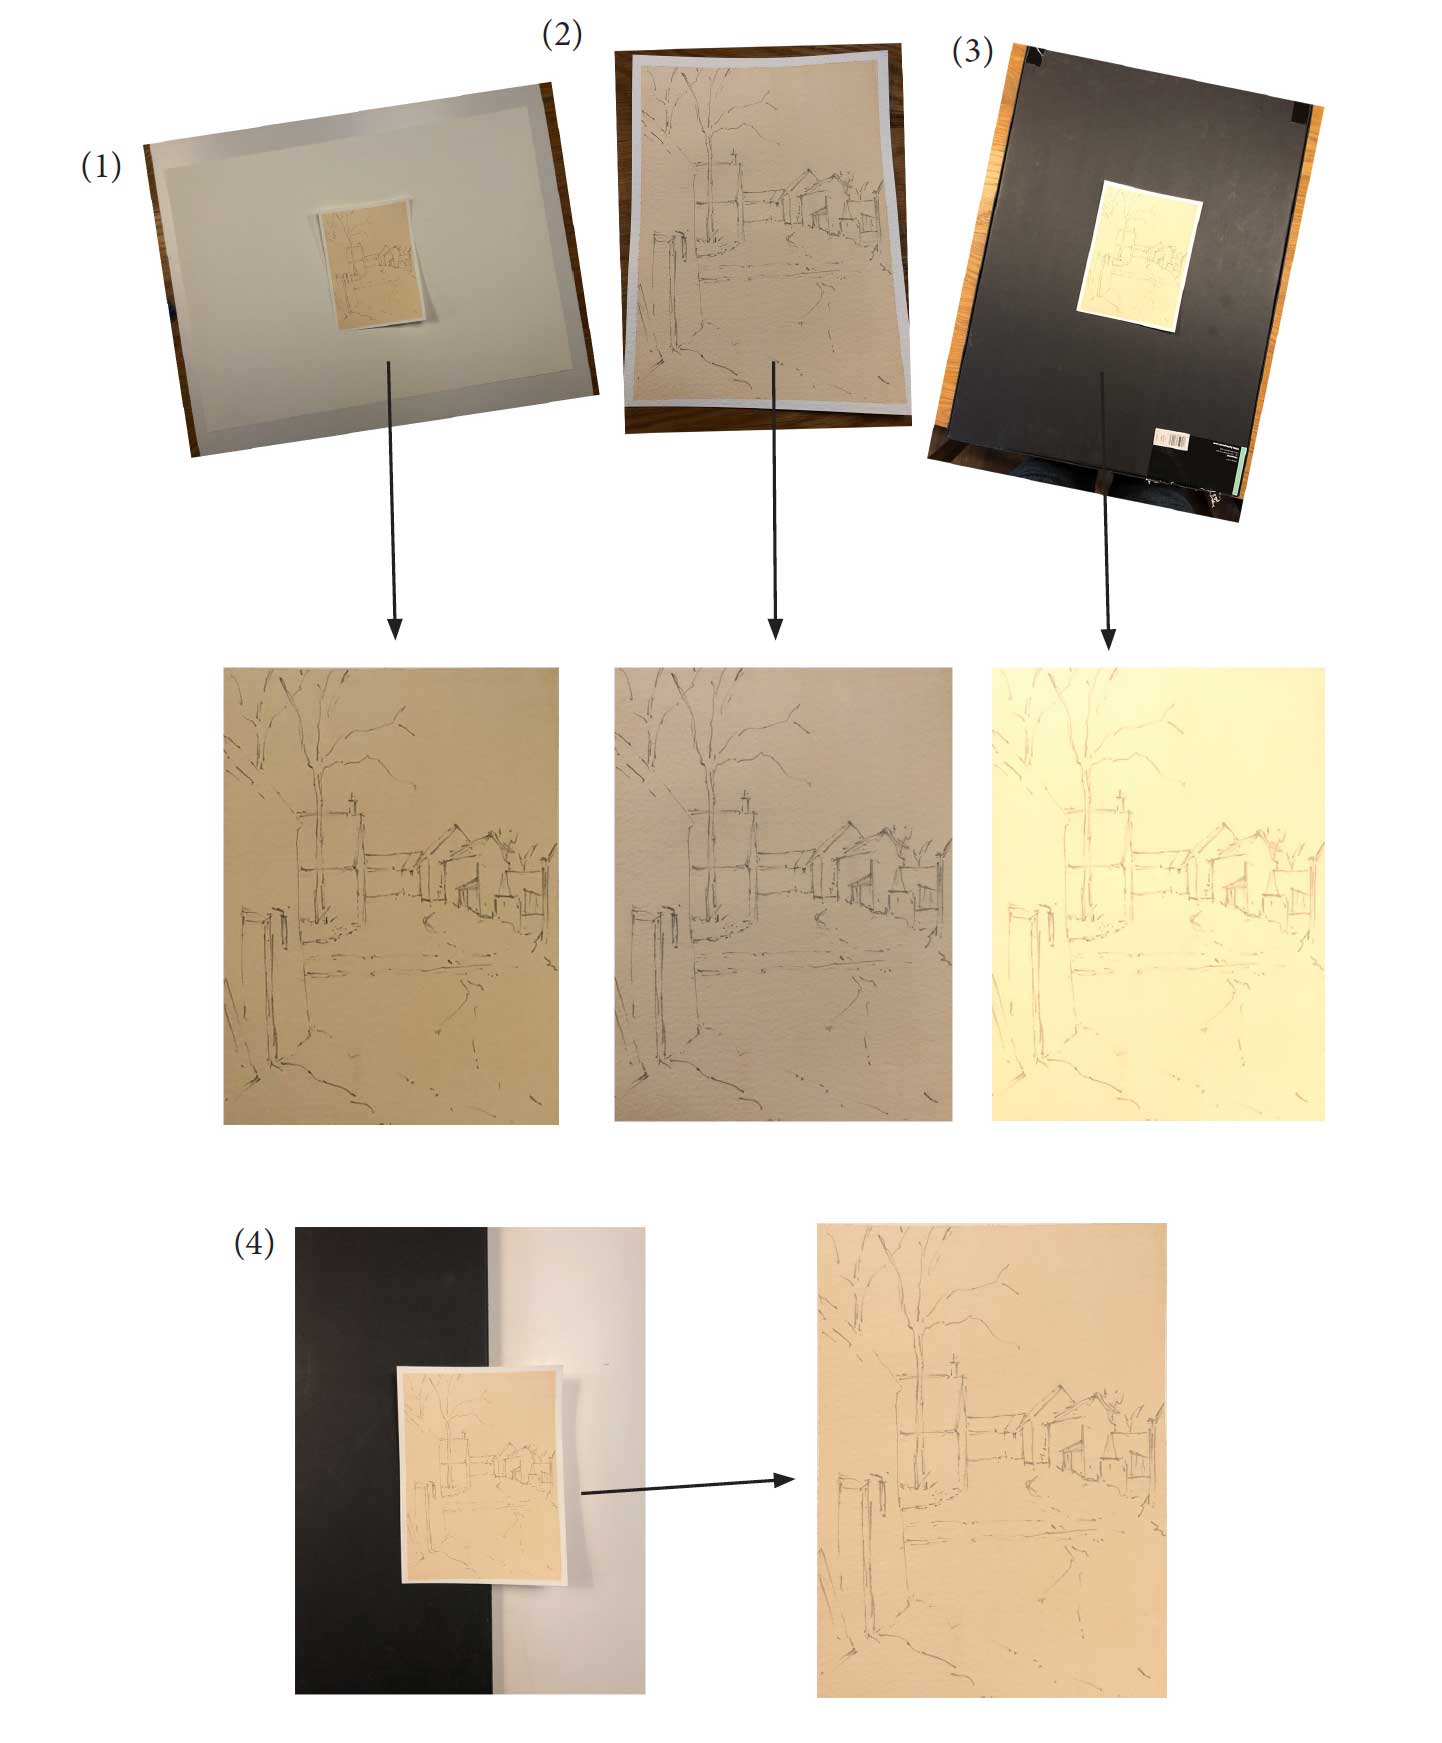
Example 1. This particular painting has a good range of colours and tones for the camera to read. Example 2. Here a simple drawing on a watercolour wash causes more problems for your camera/phone/tablet when in automatic mode! Remember your camera doesn’t know its a painting!!
Example 1

No. 1. The camera reads the image as very bright because of the large surrounding white background. It tries to balance the light and makes the image darker (under exposed).
No. 2. On this occasion the camera gives a more accurate exposure as it is trying to read the painting and not a mass of background as well.
No. 3. Here the camera reads the image as too dark, because of the background and therefore shows the painting lighter than it should be (over exposed).
No. 4. With this example the camera has taken a more accurate exposure by taking the photo closer in on the painting as No. 2, with less background. However the bluish tinge seen, is due to an outside shot with the natural light of a late January afternoon.
Example 2

You can use this knowledge to trick the camera into making your image lighter or darker.
If you think its not coming out quite right, try a few different backgrounds such as carpets, worktops etc., or the lighting conditions. See how these variations can alter your image.
With these examples, the image is more difficult for the camera. The colour and tonal range is almost non-existent. Taking a picture of this pencil sketch on a watercolour wash with an iPhone, a number of options were tested.
Alongside each camera shot is an example showing the cropped and zoomed in version with the painting extracted.
No. 1. This example with a majority white background, the image has come out darker (under exposed).
No. 2. Even with the camera focusing mainly on the painting, the photo still remains dark because it is such a light painting (under exposed).
No. 3. With a mainly black background and a light painting the painting is seen as far too bright (over exposed).
No. 4. With a 50/50 black and white background the camera seems to have been tricked into producing the most faithful reproduction of the painting – not perfect but quite adequate for a review session..!
In Conclusion
These differences can all be altered in software or by using the camera’s manual settings. However an understanding of the above can assist in taking a better and more representative photograph of your painting.
Why not experiment and have a go?
Before you do – just a few more pointers that might help:-
Try to avoid shadows across the paper.
If possible take the photo square on.
For quality purposes avoid being too far away from your painting.
Overcast cloudy days can be ideal for photographing your work outside.
Avoid bright sunny days!
(The examples we have shown are extreme in order to help us demonstrate the process).
If you are sending work into Patchings and use of these tips result in a titled or cluttered image, we are happy to straighten or crop as appropriate.
We hope this information will be helpful –
Good Luck
